This post may contain affiliate links. Please see our disclosure policy.
Some of my favorite grilled chicken wings have been made on a Weber kettle charcoal grill. Learn how to make the best charcoal grilled wings in this ultimate beginners’ guide, and get my favorite recipe for buffalo wings!

If I had to pick one grill or smoker to use for making grilled chicken wings, then it would be a Weber kettle charcoal grill. Every. Single. Time.
And, in fact, if I had to choose one cooking method for chicken wings, and only eat wings prepared that way for the rest of my days, it would be grilled wings. Forget the oven-baked, rubbery skin version. Heck no to the deep fried, overly greasy wings. And slow cooker and chicken wings don’t even belong in the same sentence.
When you master the temperature controls of a standard Weber kettle (or any charcoal grill for that matter), you may never go back to cooking party wings a different way again. I even like these more than my crispy smoked chicken wings on a pellet grill.
Here’s way more information than you ever wanted to know about how to perfect Weber kettle chicken wings, and my favorite grilled wings recipe with just 3 main ingredients! And, spoiler alert, you don’t even need a vortex!

Why Charcoal Grilled Wings are Best
Not to boast, but as a grill enthusiast and outdoor cooking YouTuber, I have my choice of a variety of grills and smokers to use for making wings. So why do I continue to roll out my $200 Weber kettle for the job – even passing up my grills that are 10x the price?
Because you can’t beat the flavor of charcoal smoke and the fat rendering of an open flame. No matter how good your pellet grill is or how well the broiler in your oven works, the crispy, charcoal-grilled exterior of Weber kettle wings is unmatched. Once you master the temperatures of your charcoal grill, no other cooking methods even come close.
*If you do want the convenience of the gas grill, I recommend adding a smoke tube to your grill for extra smoke flavor. This inexpensive contraption and some wood pellets can up the flavor profile of your chicken wings. Go here to see how to use a smoke tube.
The Method: Low and Slow, Then Sear
This is my tried-and-true approach to the best crispy wings, and it involves a cooking method that’s commonly used for steak – a reverse sear.
Smoke the wings gently at a lower temperature of about 250-275°F for the first hour, and then adjust the vents to get more oxygen to the coals for a hotter fire. Finish with a high-heat blast to crisp up the skin and caramelize your favorite wing sauce.

These are the key elements to success for charcoal grilled wings:
- Two-Zone Charcoal Set Up – Direct and indirect heat zones are crucial for controlling how quickly your wings cook and how successfully you’re able to render the fat and get crispy skin.
- Charcoal Snake Formation – My “lazy man” snake method ensures low and slow heat without the hassle of perfectly positioning every charcoal briquette.
- Avocado Oil Cooking Spray – A quick light spray of a good high-heat cooking oil helps to crisp up the skin once you adjust the grill temp up.
- Smoked, Then Crisped – This “reverse sear” method of sorts will give you perfectly cooked, juicy wings with a delicious crispy crust.
- Proper Airflow and Ventilation – Cooking on a charcoal grill is all about managing the amount of oxygen that gets to the coals, since fire needs oxygen. Too much oxygen, and your grill will get too hot, burning the wings on the outside before they have a chance to fully cook and render on the inside. So proper vent and lid positioning is crucial for smoke and temperature control.

Prepping the Wings for the Grill
For the best charcoal grilled chicken wings, I recommend a simple dry brine to draw out the moisture from the skin, giving you crispy wings. If you’ve ever had rubbery chicken skin, then you know how important this extra step is!
Follow these steps to prep the wings, before you even light your charcoal:


Step 1: Cut the chicken into party wings. To get started, cut your chicken wings into drums and flats (often referred to as “party wings”), and remove the wing tips. *TIP – You can add all of the wing tips to a zip top freezer bag and store them in the freezer to use for homemade chicken stock, soups, and more.
Step 2: Salt brine the wings. Lightly sprinkle all sides of the wings with kosher salt – I prefer Diamond Crystal kosher salt for this. Then space them out on a wire cooling rack set on top of a sheet tray, and refrigerate uncovered for at least 4 hours. This really helps to dry out the skin for better browning, so I wouldn’t recommend skipping this step.

Step 3: Season the party wings. Sprinkle all sides of your wings with your favorite all-purpose seasoning or dry rub. We used our own Spice That Jalapeno All-Purpose Seasoning, which is a perfect AP with a bit of extra heat. Spice That and chicken wings are a match made in Heaven!
*TIP – Be sure to taste your seasoning first. If the blend you’re using is salt-heavy, then go lighter on the seasoning since your wings are already salt brined.
Charcoal and Grill Set Up
After your chicken is dry brined, it’s time to fire up the grill and get your temperatures dialed in. Here are the steps to properly set up your grill for smoked then seared wings:
Step 1: Create a two zone system. Bank enough charcoal briquettes to wrap around about 1/4 of the inside of the kettle about 4-5 briquettes high. The other 3/4 of the grill won’t have charcoal, allowing you to create a cooler (indirect) side and a hotter (direct) side.


Step 2: Light the charcoal. Place about 8-10 briquettes in a charcoal chimney. Then place a fire starter directly on the bottom grill grate, light it, and place the charcoal chimney on top to light the charcoal. *There are other ways to light a charcoal grill, but the charcoal chimney method is my favorite.
Step 3: Add the lit charcoal to one side of the unlit charcoal. After about 8-10 minutes, the charcoal briquettes should be ashy gray colored. Dump the coals out near one end of your lazy man’s snake so that they’re nestled up against the unlit briquettes.
*TIP – For extra smokiness, nestle a couple of wood chunks along your briquette line, as I did in the photo above.

Step 4: Dial in the vents on the charcoal grill. Place the main cooking grill grate on the grill, close the lid, and adjust the upper and lower vents so they are only very slightly open for smoking.
Position the exhaust vent on the lid so that it’s over top of the indirect heat side of the grill (where you’ll place the wings) for smoke and air to flow properly. For smoking, start with the top vent about 1/4 open – aim for a grill temperature of about 250-275°F.
For the bottom vent, position the lever over the far left hole so that only a small amount of air flows through. Assuming that you don’t have too much charcoal lit, this position should give you a perfect smoking temperature on your charcoal grill.
Let the grill heat up for about 15-30 minutes for the temperatures to stabilize to about 250-275°F. Then you’re ready to start grilling chicken wings!
How to Make Chicken Wings on a Charcoal Grill


Step 1: Smoke the wings low and slow. Arrange the wings in a single layer, grouped together, away from the charcoal. Close the lid, monitor the temperatures to make sure you don’t have any spikes, and smoke at about 250-275°F for 1 to 1.5 hours. This low and slow start helps to add smoke flavor and starts to render the fat.
Step 2: Spray the wings with cooking oil. After the wings have been smoking for about 1 to 1.5 hours, spray or very lightly brush them with a high-heat cooking oil. Duck fat spray is a good choice, or I also like to use avocado oil cooking spray. The added oil helps to crisp up the skin when you raise the grill temp.


Step 3: Increase the grill temperature. Transfer the oiled wings to a sheet tray, and increase the temperature of the grill by piling the lit charcoals on top of the unlit coals. Open the top and bottom vents all the way for maximum air flow, and put the lid back on the grill. As the coals get more oxygen, the grill will get hotter. Aim for a grill temperature of about 400-450°F.
*I like to take the wings off the grill while the temperature is raising, that way they have longer to cook at the higher temp to crisp up. However, you can leave them on the grill while the temp rises if you prefer.
Step 4: Continue to grill the wings at the higher temperature. Return the wings to the grill grate, still offset from the heat. Continue to cook the wings at the higher temperature with the lid closed. The higher heat will help to render the fat and crisp up the skin on the wings, and since they’re still on the indirect heat side, they shouldn’t burn.


Step 5: Continue to cook the wings, rotating them over the coals as needed. Rotate the chicken wings for even color, keeping in mind that flats will cook quicker than the drums. For additional crunch, finish drums by moving directly over hot coals, but watch carefully! Crispy skin can turn charred in seconds.
Step 6: Lightly baste on sauce. The last step is to add flavor with your choice of sauce. My favorite wings are classic buffalo style, and I like to use Frank’s Buffalo Wings sauce right from the bottle.

Wing Saucing Tip:
For a nice light coat of sauce that doesn’t overpower your perfectly cooked wings, you can screw a clean food-safe spray bottle nozzle directly on the bottle of buffalo sauce – an old trick in the barbecue world.
I also like to finish my wings with a light drizzle of Mike’s Hot Honey for a subtle sweet-spicy kick. The combination of the spicy buffalo sauce and the sweet honey is a real winner!
You can also move the sauced wings directly over the hot coals for a few minutes for the sauce to caramelize and tack up.
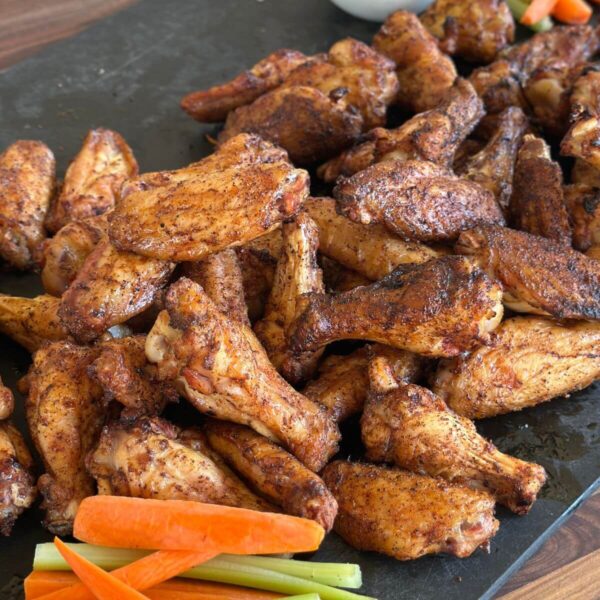
Then your wings are ready to serve – preferably with a fantastic homemade dip like our favorite chunky blue cheese dressing! Trust me, if you’re a blue cheese fan with your grilled chicken wings, then this dressing does NOT disappoint!

Tips for the Best Grilled Wings
- Don’t overcrowd the grill. Space is limited on most charcoal grills, and you need to leave enough space to get the chicken wings off of the direct heat source. Aim to only put your wings on about 1/2 of the grill so that you’re able to rotate them as needed.
- Grilling temperatures are flexible. You don’t need perfection, especially when using a charcoal grill – a range of 250–300°F works until you’re ready to sear.
- Use my charcoal grill lid hack if needed. Some charcoal grills have smaller air vents, which makes it more difficult to get your grill to a higher cooking temperature. If needed, you can offset the lid on the rim just a bit, leaving an additional 1/2 to 1″ air gap for more oxygen.
- Cook past 165°F internal temperature. The proper internal temperature for chicken breasts is 165°F, but wings have a higher fat content, and they’re actually better when cooked to about 185-190°F internal. The fat will render better, and you shouldn’t have rubbery chicken skin when you cook them past the technical “doneness” for chicken.
No, you don’t need to have a vortex or any other fancy equipment to make fantastic grilled wings on a Weber kettle or other charcoal grill. In fact, I’ve never owned a vortex, and I’ve been making wings that would rival any restaurant for decades now.
With a bit of practice, the correct amount of charcoal, and the proper vent positions, you can easily control the temperatures without the need for any type of heat deflector device.
A standard Weber kettle charcoal grill, arguably one of the most popular charcoal cookers on the market, is 22″ round. You can fit about 18-22 chicken wings, or about 36-44 party wings (individual drums and flats), on a standard kettle with enough room to grill them off the direct heat. 
If you follow our method of smoking the wings at a lower temperature first, and then cranking up the heat to finish them off for crispy skin, then the total cooking time is about 1 hour 45 minutes to 2 hours 15 minutes.
That’s about 1 to 1.5 hours at a temperature of 250-275°F for smoking the wings, and then about 45 minutes to 1 hour at the higher temperature to get them crispy.
However, cooking times may vary based on the size of your wings, the specific grill that you’re using, and your ability to maintain consistent temperatures.

Grilled Chicken Wings
Ingredients
- 5 lbs chicken wings, separated into drums and flats, tips removed
- 1½ – 2 tablespoons kosher salt
- 2-3 tablespoons Spice That Jalapeno All-Purpose seasoning, or all-purpose seasoning of your choice
- spray cooking oil, like avocado oil spray
- ¼ cup buffalo sauce, see notes
- 2 tablespoons honey, or hot honey
Instructions
- Dry brine the wings. Lightly sprinkle all sides of the wings with kosher salt (about ⅛ teaspoon per wing). Then set the wings on a wire cooling rack on top of a sheet tray. Refrigerate uncovered for 4-8 hours.
- Season the wings. Sprinkle all sides of your wings with all-purpose seasoning. *Be sure to taste your seasoning first. If the blend you’re using is salt-heavy, then go lighter on the seasoning since your wings are already salt brined.
- Heat the charcoal grill. Build a two zone fire with the coals on one side of the grill using a snake method set-up for the charcoal. Close the lid and adjust the vents until the grill temperature settles in to about 250-275℉.
- Smoke the wings low and slow. Arrange the wings in a single layer, grouped together, away from the charcoal. Close the lid, monitor the temperatures to make sure you don’t have any spikes, and smoke at about 250-275°F for 1 to 1½ hours.
- Spray the wings with cooking oil. After the wings have been smoking for about 1 to 1½ hours, spray or very lightly brush them with a high-heat cooking oil. *I prefer Chosen Foods avocado oil cooking spray or duck fat spray for this.
- Remove the wings from the grill, and increase the grill temperature. Transfer the oiled wings to a sheet tray, and increase the temperature of the grill by piling the lit charcoals on top of the unlit coals. Open the top and bottom vents all the way for maximum air flow, and put the lid back on the grill. As the coals get more oxygen, the grill will get hotter. Aim for a grill temperature of about 400-450°F.
- Continue to grill the wings at the higher temperature. Return the wings to the grill grate, still offset from the heat. Continue to cook the wings at the higher temperature with the lid closed, about another 30-45 minutes.
- Rotate grilled chicken wings over the coals as needed. Continue cooking, rotating the chicken wings for even color, until the internal temperature of the wings reaches about 185℉. Flats will cook quicker than the drums. If needed, finish drums by moving directly over hot coals, but watch carefully so they don't burn.
- Lightly sauce the wings and cook an additional 2-4 minutes. When wings are about 185℉ internal temp, lightly sauce with buffalo sauce. *I prefer to use a food-safe spray bottle nozzle screwed directly on to the bottle of buffalo sauce for light saucing. Then drizzle lightly with honey (or hot honey). Move the sauced wings directly over the hot coals for 2-4 for the sauce to caramelize and tack up.
- Remove from the grill, spritz with sauce, and serve. Transfer grilled chicken wings to a serving platter. Spritz or very lightly baste with a bit more buffalo sauce. Serve with blue cheese or ranch dressing for dipping.
Video
Notes
- Don’t overcrowd the grill. Space is limited on most charcoal grills, and you need to leave enough space to get the chicken wings off of the direct heat source. Aim to only put your wings on about 1/2 of the grill so that you’re able to rotate them as needed.
- Grilling temperatures are flexible. You don’t need perfection, especially when using a charcoal grill – a range of 250–275°F works until you’re ready to sear.
- Cook past 165°F internal temperature. The proper internal temperature for chicken breasts is 165°F, but wings have a higher fat content, and they’re actually better when cooked to about 185-190°F internal. The fat will render better, and you shouldn’t have rubbery chicken skin when you cook them past the technical “doneness” for chicken.
- Cooking times will vary. The amount of time it takes to cook chicken wings on the grill will vary based on the size of your wings, the temperature of your grill, etc. Cooking times in the recipe are provided as a guide only. For reference, by chicken wings took about 1 hour 50 minutes with this smoke then sear method.

Pin this now to find it later
Pin It