This post may contain affiliate links. Please see our disclosure policy.
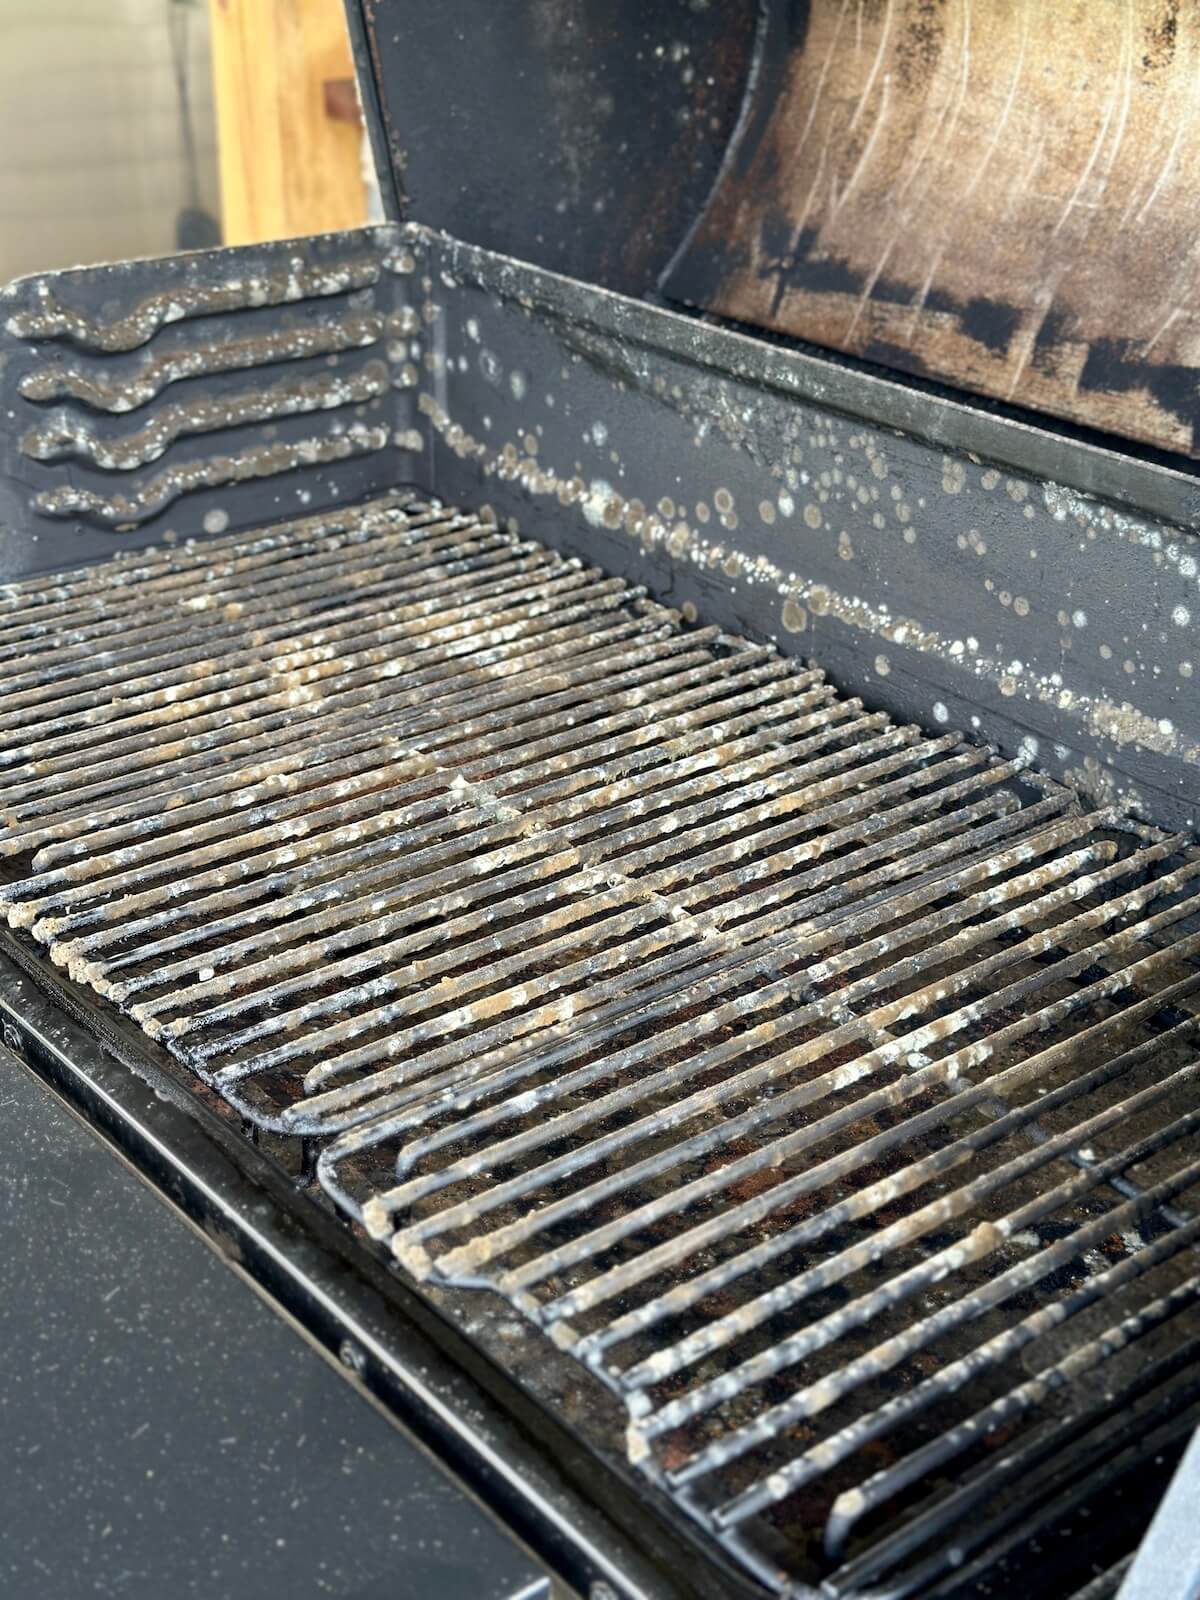
Spring grilling season is back — but if you’ve lifted the lid on your grill and found a fuzzy, moldy mess staring back at you, don’t panic. It happens to almost every grill owner who puts their equipment away for the winter, and it’s easier to fix than you think. With a little heat, a vinegar-water mix, and some elbow grease, your grill will be clean, seasoned, and ready to cook on in no time — no harsh chemicals required.
Every spring it’s the same story. You pull the cover off your grill, lift the lid, and immediately wish you hadn’t. Mold happens. It’s one of the most common issues that backyard grillmasters run into, whether it’s a kettle charcoal grill, a stick burner, a gas grill, or a pellet grill.
But the good news is it’s completely fixable — no harsh chemicals, no stripping your seasoning, no starting from scratch.
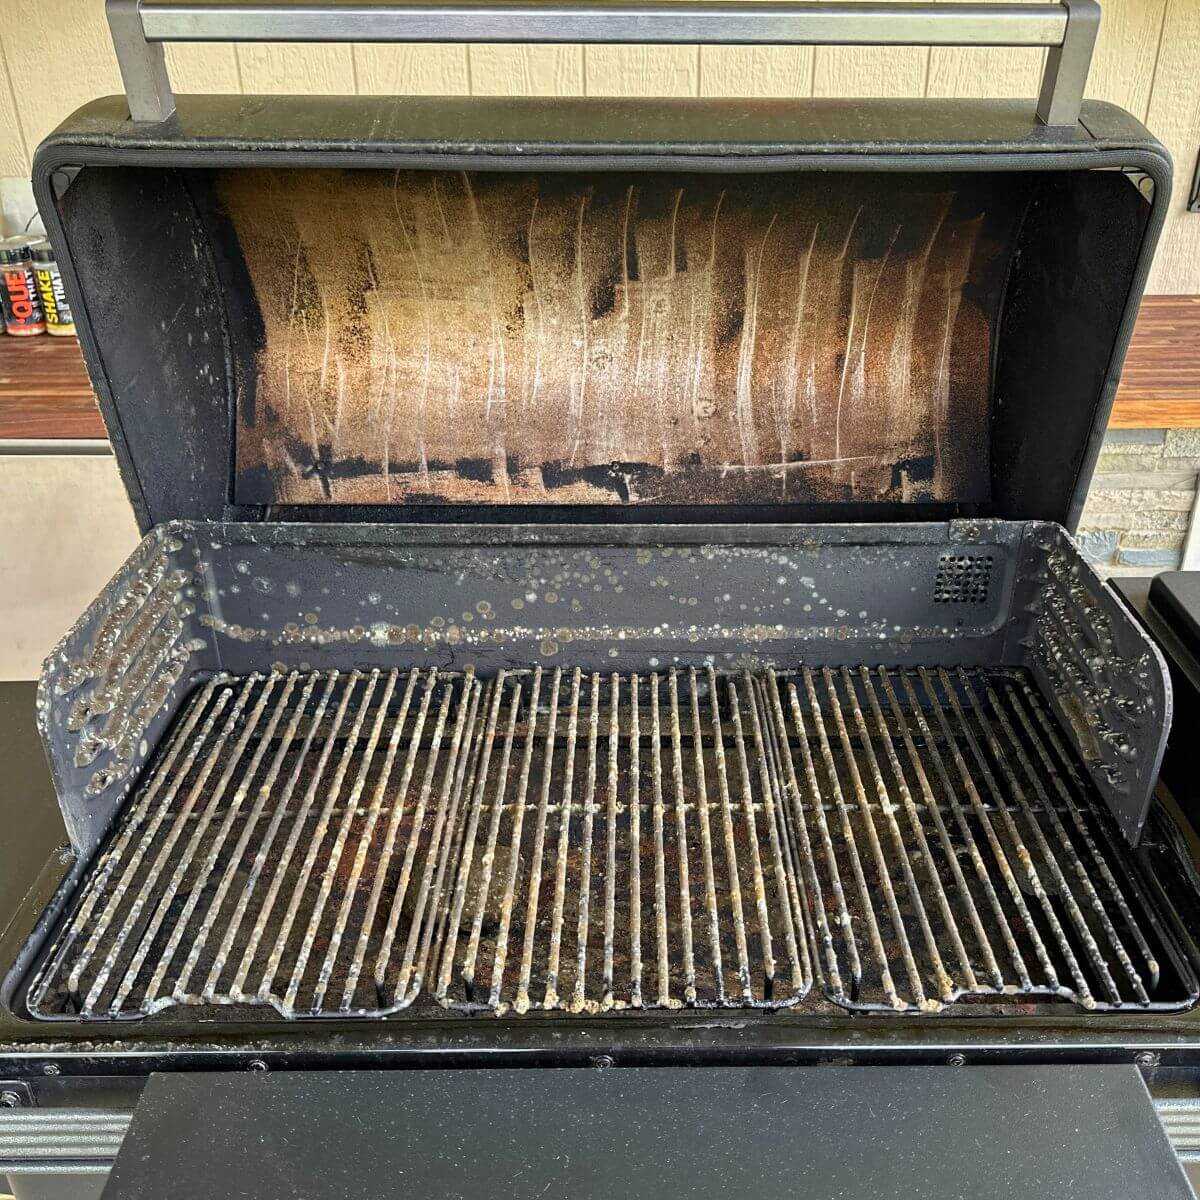
In this guide, we’re walking through the full process used on a Traeger Ironwood XL, but these steps apply to virtually any moldy grill.
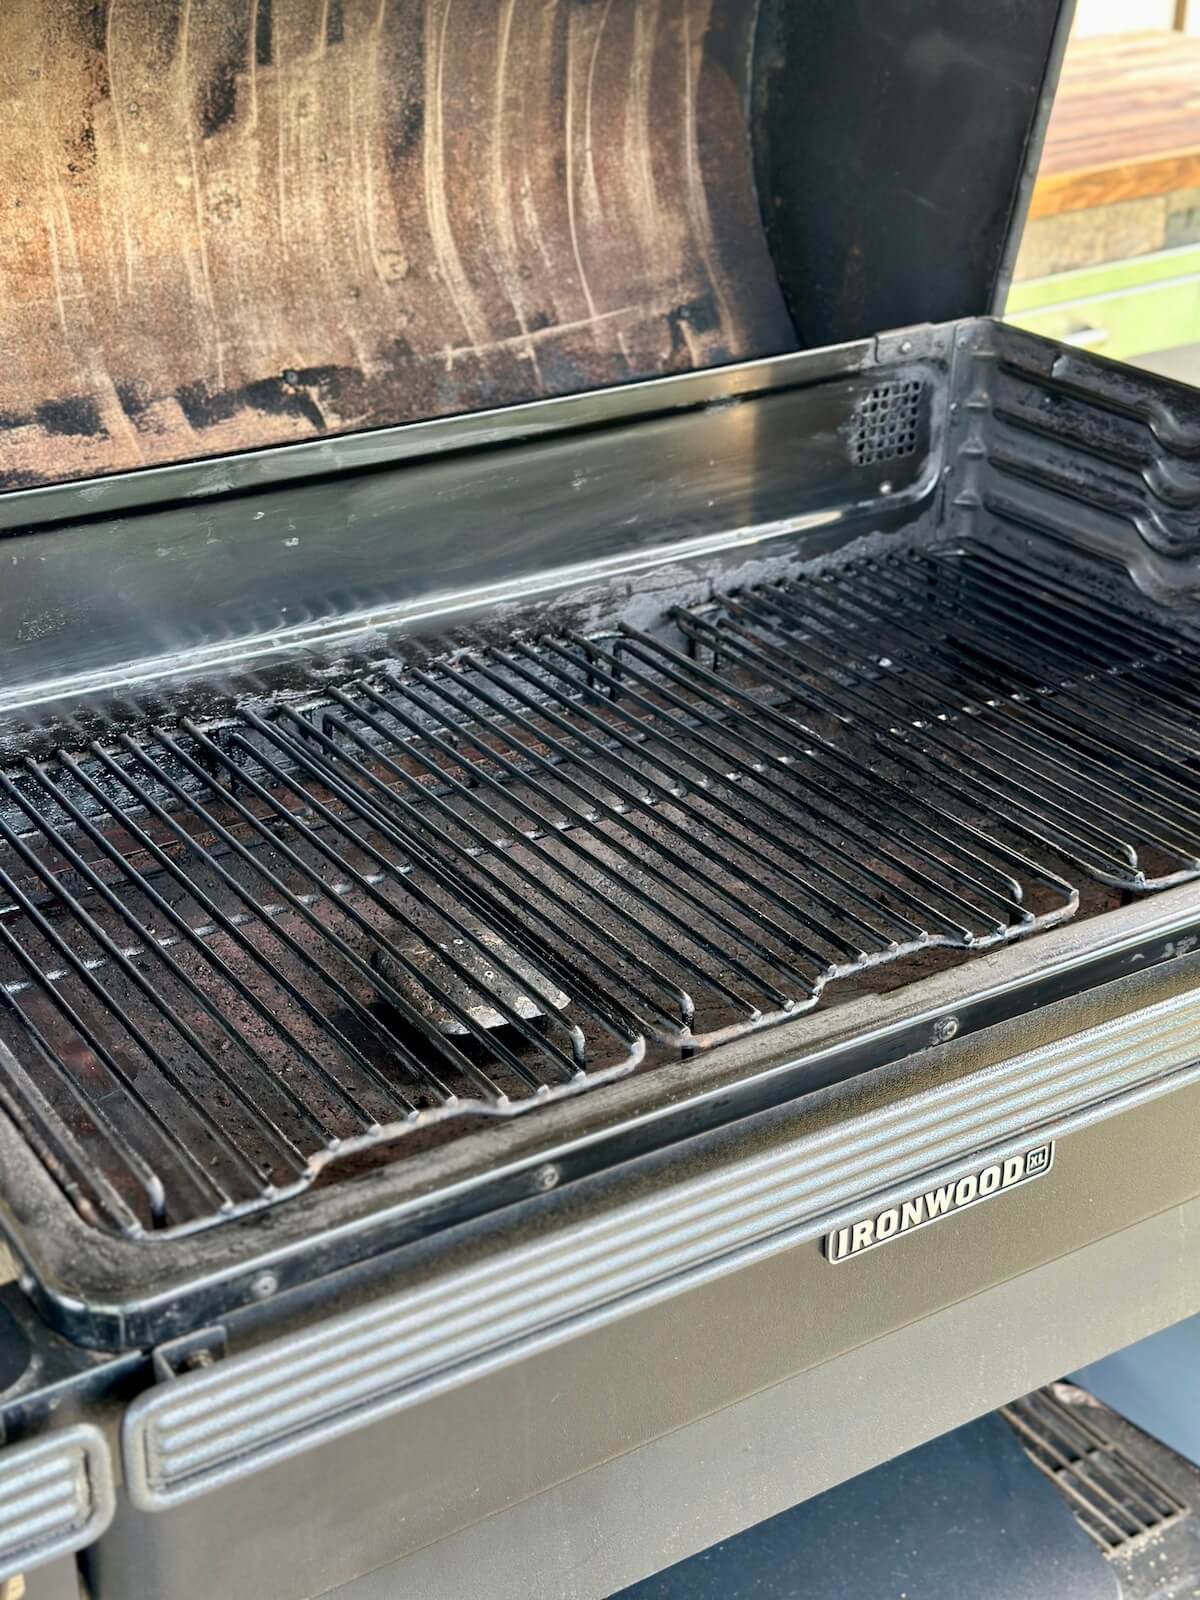
Here’s a side-by-side view of the Before and After photos of my grill:
What You’ll Need
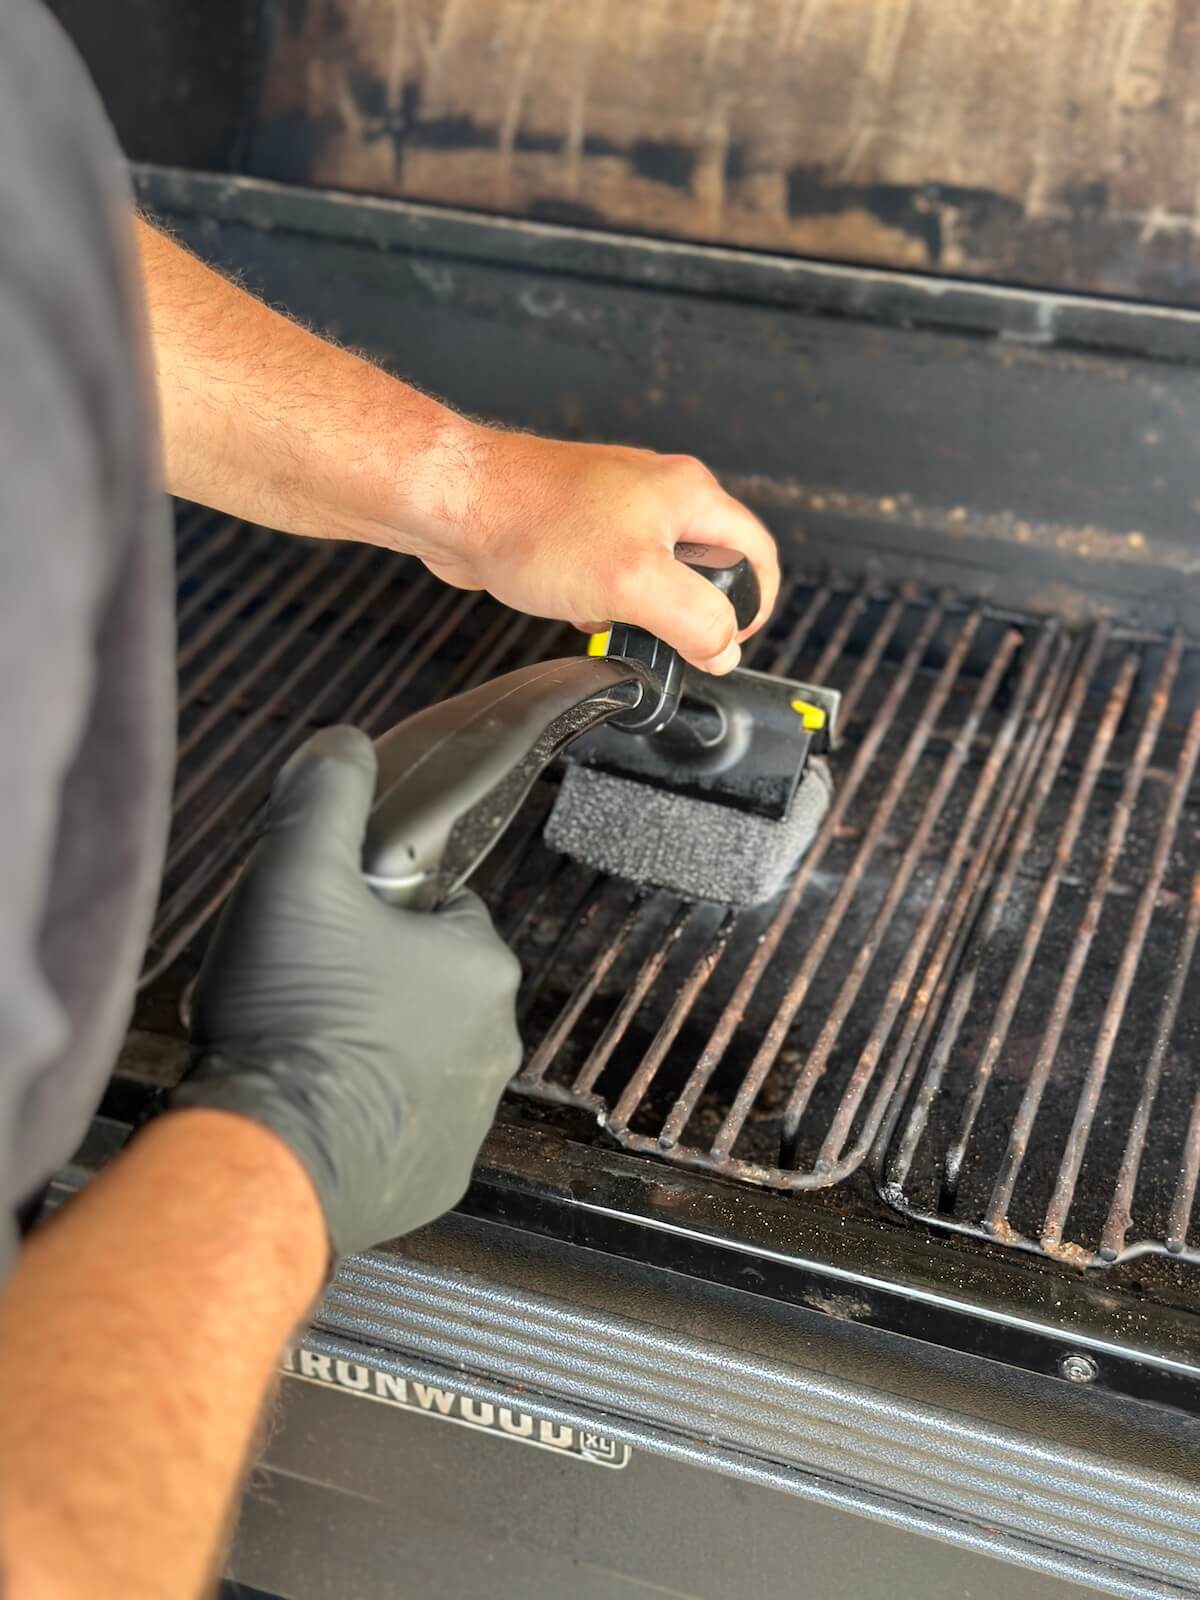
- Grill brush or GrillDaddy – I prefer to use this GrillDaddy grill brush, because it doesn’t have any metal bristles, which may become dislodged and end up in your food.
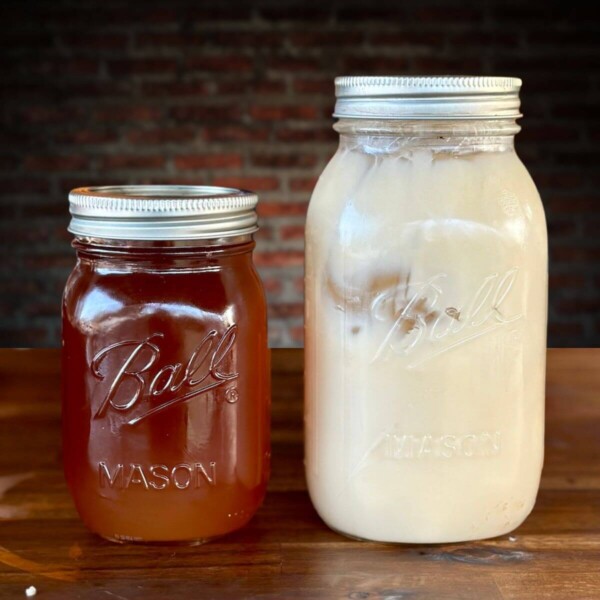
- White vinegar + water – A 50/50 mix in a spray bottle.
- Heat-proof gloves – It’s easiest to clean your grill grates and the interior while it’s warm, so good heat-proof gloves protect your hands.
- Avocado oil or duck fat spray (for re-oiling after) – This isn’t completely necessary, but I do sometimes prefer to apply a very thin layer of oil to the inside of the grill to protect it from rust.
- Bowl of water (ice optional)
- Paint scraper or flat-edge tool – I use a cheap paint scraper to scrape the interior side walls and inside the lid of the grill. A putty knife also works well.
That’s genuinely it. No degreasers, no bleach, no industrial cleaners. Anything that strips the natural oils from the inside of your grill is working against you.
Cleaning a Moldy Grill: Step by Step
1. Clean out all the grease first — this is non-negotiable
Before you fire up the grill, make sure the grease drain pan and drip bucket are completely empty and clean. Grease is what starts grease fires, especially when you’re running your grill at high temps to get rid of mold and grime.
The grease collection system varies from grill to grill, so be sure to check your owner’s manual for the recommended method. For instance, my Weber kettle grill has an ash bucket underneath, but my Traeger pellet grill has a grease drip pan that funnels the grease to a grease bucket.
Just make sure that any excess grease is cleared out. You can also scrape down the interior side walls and the inside of the grill lid to remove excess grease.
2. Reassemble the grill and crank the heat to 450–500°F
Put everything back together — grill grates, heat deflector, drip tray, or other interior parts that your grill has. Then fire the grill up to between 450 and 500°F. Run it for 45 minutes to a full hour.
This is your main weapon against mold. The high heat incinerates it, and also burns off any residual built-up grease. Think of it like running a self-cleaning cycle on your oven.
You can use inexpensive fuel for this step. For instance, if you’re cleaning a moldy charcoal grill, use a less expensive brand of charcoal. For pellet grills, use cheap pellets for this step. No need to burn your premium fuel since you won’t be cooking anything.
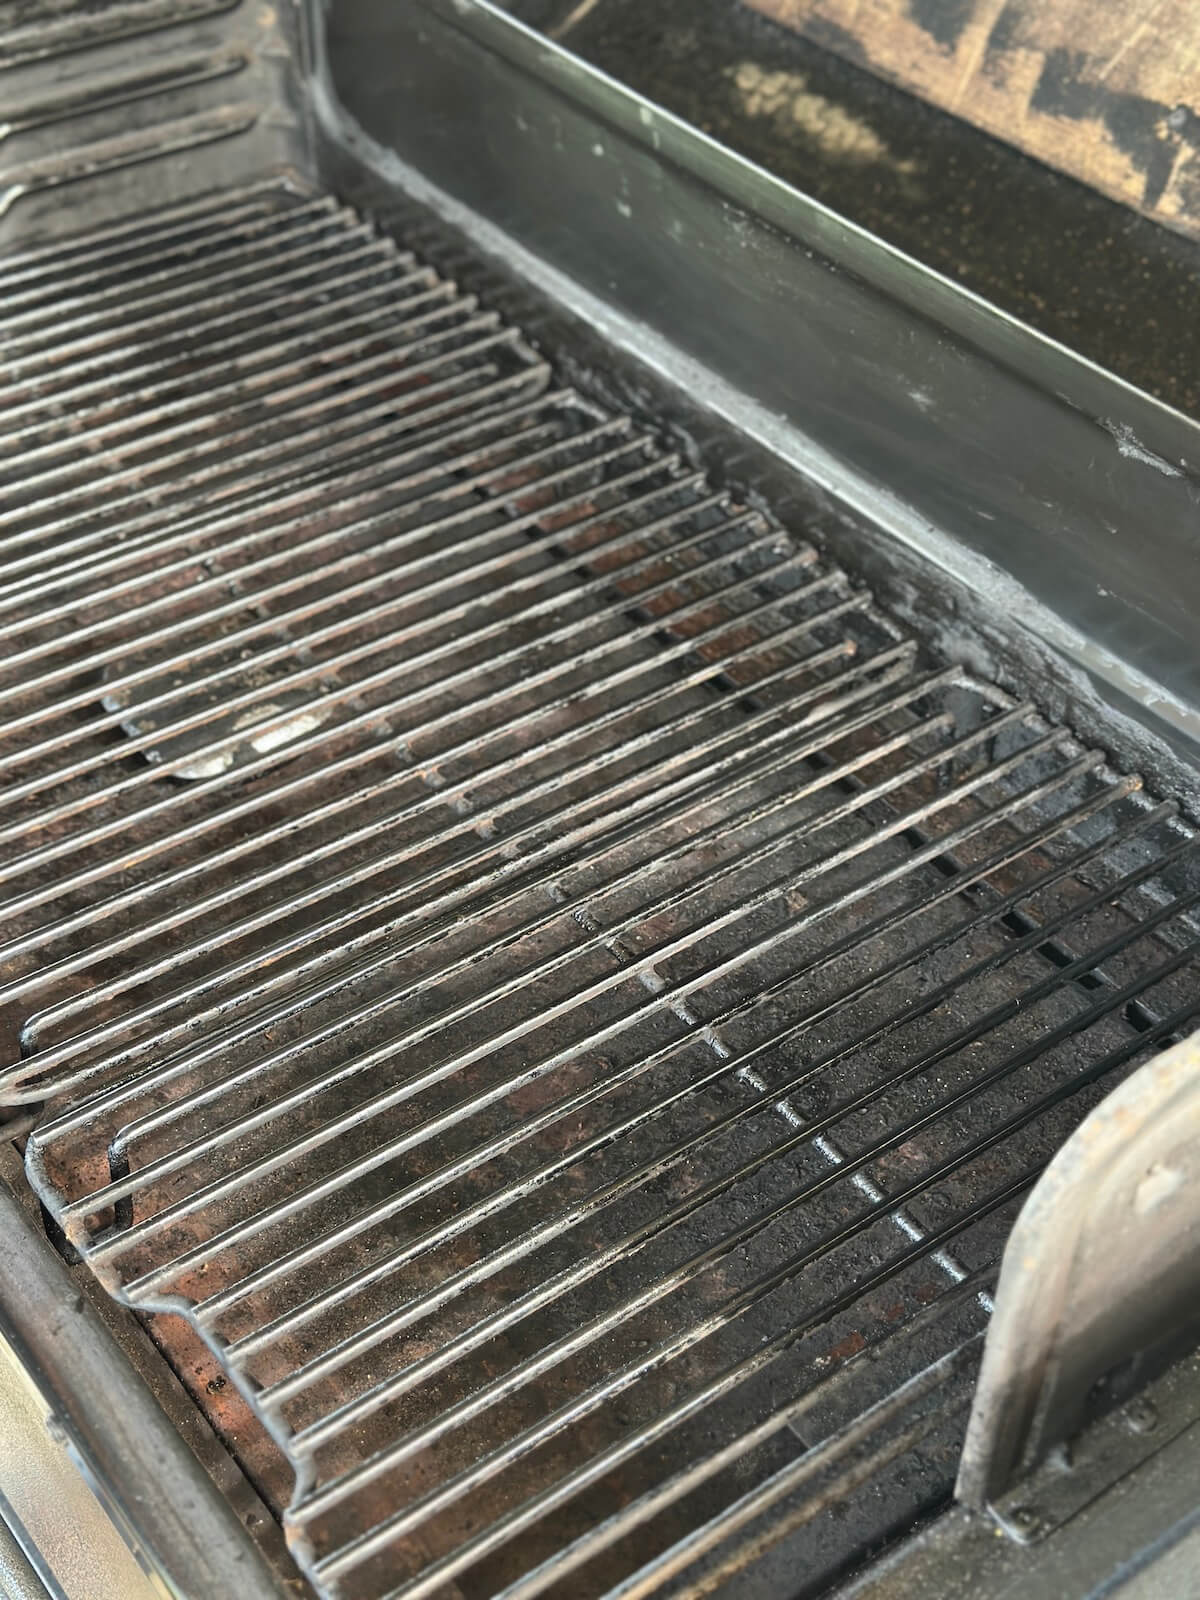
3. While it’s still hot, scrub the grates
After about 45 minutes to 1 hour, it’s time to scrub grates. Using heat-proof oven mitts, dip the end of your Grill Daddy or other grill brush into ice cold water, and start scrubbing the grates with your brush while the grates are still warm. The heat makes this dramatically easier — everything comes off with much less effort. You’ll be surprised how clean the grates look just from this step alone.
*TIP – You can also use a balled-up piece of aluminum foil to scrub your grill grates and remove gunk. I’ve done this many times in the past.
4. Remove grates and hit them with the vinegar solution
Pull the grates off and spray them down with your 50/50 white vinegar and water mix. Vinegar is a natural sanitizer that won’t strip your seasoning or leave chemical residue. No bleach rinse, no degreaser soak — just vinegar and water. You can also do a light hand wash with Dawn dish soap before rinsing and drying, if you wish – though it’s not necessary.
5. Wipe down the interior and reassemble
Use a paint scraper or flat brush edge to knock loose debris off the interior walls while everything cools. Wipe down surfaces with the vinegar solution, then put everything back together.
Tips from the Pit
- Never use degreasers, bleach, or chemical cleaners on the inside of your grill. The natural fats from your cooks — brisket drippings, pork fat, chicken skin — build up a seasoning layer that protects the metal from rust. Strip that away and you’re starting over.
- Don’t try to make the inside look brand new. A dark, seasoned interior is exactly what you want. Scratches, discoloration, and buildup are signs a grill has been cooked on well — not neglected.
- For regular maintenance throughout the year, scrape everything down after every 6-8 cooks, and do a high-heat burn-off at 450–500°F for 30–45 minutes. It keeps grease from building up to fire-hazard levels.
My Hack for Cleaning the Outside of a Grill
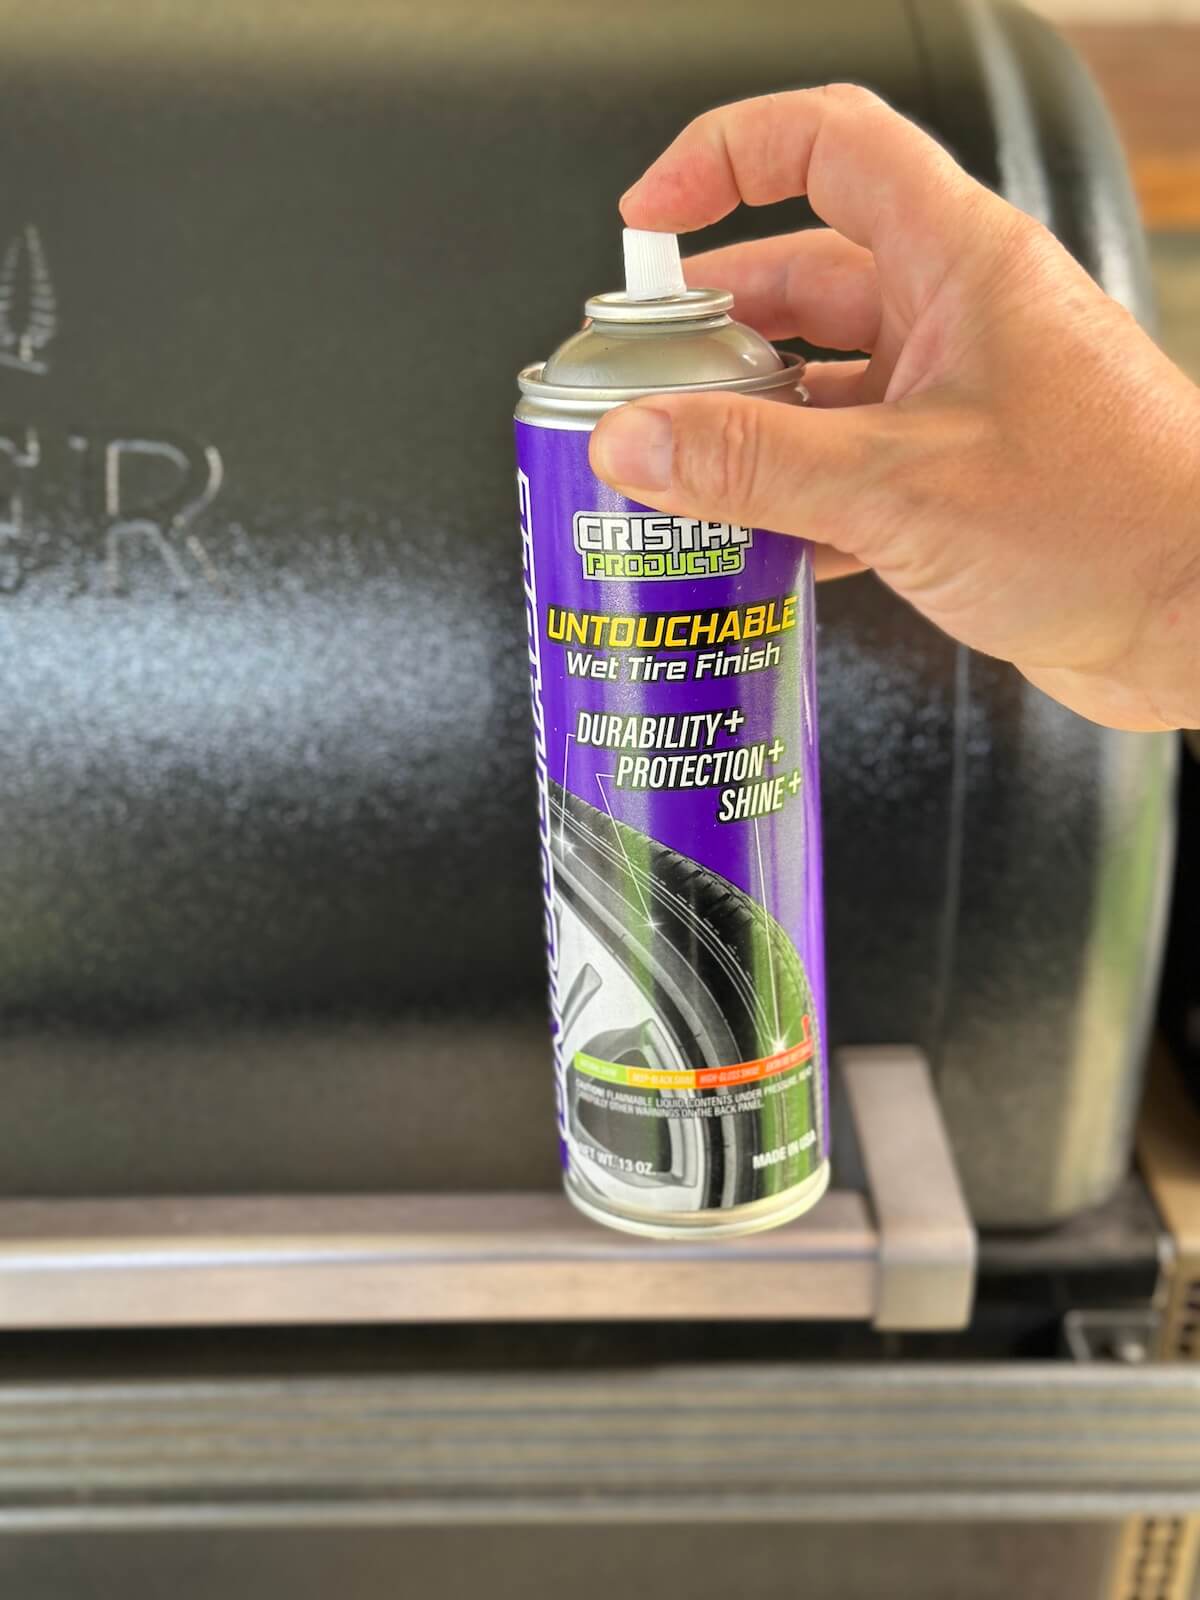
If your grill has a black exterior finish, like most Traeger pellet grills or Pit Boss grills, then you can use a wet tire finish automotive cleaner. A coat of tire finish spray on the black exterior makes it look brand new. Just spray on and wipe with a lint-free rag.
Frequently Asked Questions
Absolutely not. Mold from a stored grill is extremely common and not a reason to replace it. High heat kills mold effectively — running your grill at 475–500°F for an hour eliminates it. This is a normal part of grill ownership, especially in humid climates.
Some people pressure wash and that’s their call, but chemicals like bleach and degreasers strip away the seasoning layer that protects the metal. Once you strip it, you’re starting from scratch — and in the meantime, bare metal is more susceptible to rust.
The main culprit is moisture sitting in a covered grill that isn’t being used regularly. Before putting the grill away for a season, do a high-heat cleaning cycle to burn off as much residual grease as possible. Some folks also store with the cover slightly vented to prevent condensation buildup.
Pinterest User? Do us a favor and PIN this to your board for grilling tips to save it for later.